Desktop OBS Studio RTMP Setup for AIOZ Stream
Introduction
AIOZ Stream is a decentralized live video streaming platform for broadcasting to your audience.
In this guide, you will set up OBS Studio on desktop and connect it to AIOZ Stream using your Server URL and Stream Key.
Before you start
Before configuring OBS Studio, make sure you have the following:
- An AIOZ Stream account with access to the AIOZ Stream Dashboard (opens in a new tab).
- Your Server URL (RTMP URL) and Stream Key for streaming to AIOZ Stream.
- A stable internet connection with enough upload bandwidth for your target quality (e.g., 720p or 1080p streaming).
- Camera and microphone permissions enabled on your operating system (if you plan to use them).
- OBS Studio installed on your device.
NOTE: You do not need to manually create a livestream entry in the AIOZ Stream Dashboard (opens in a new tab) before going live. AIOZ Stream can create it automatically after you start streaming with valid credentials.
Tested with: OBS Studio version 30.2.3 on Windows or 31.1.0 on macOS.
SECURITY NOTE: Keep your Stream Key private. Do not share it in screenshots, recordings, or public channels.
Download and Install OBS Studio
If you haven't already, download and install OBS for your operating system from the official website (opens in a new tab).
Configure Your Scene
Open OBS and set up what you want your audience to see.
- Create a Scene: In the Scenes panel (bottom left), click the + button and name your scene.
- Add Sources: In the Sources panel, click the + button.
- Select Video Capture Device to add your webcam.
- Select Display Capture or Window Capture to share your screen or a specific application.
- Arrange and resize your sources in the preview window until you are satisfied with the layout.
Before continuing, confirm the following in OBS Preview:
- Your camera or screen source is visible and not black.
- Your microphone audio meter is moving when you speak.
- The correct camera and microphone devices are selected.
- Your scene layout is properly framed for your intended output.
- Your canvas aspect ratio matches your target stream format (e.g., 16:9 for 1080p or 720p).
Connect to AIOZ Stream
Now you need to link OBS to your AIOZ Stream account using your stream credentials.
- Click Settings in the bottom-right control panel.
- Navigate to the Stream tab.
- Set Service to Custom.
- Enter your Server (RTMP URL) and Stream Key in OBS.
NOTE: If a livestream entry has not been created yet, AIOZ Stream can create it automatically after you start streaming with valid credentials.
You can find your stream credentials in the AIOZ Stream Dashboard (opens in a new tab).
Credential format:
- Server: Use the exact Server URL provided by AIOZ Stream.
- Stream Key: Your unique ingest key from AIOZ Stream.
- Protocol support: RTMP only.
SECURITY NOTE: Keep your Stream Key private. Do not share it in screenshots, screen recordings, or public channels. If your Stream Key has been exposed, rotate or regenerate it immediately in the AIOZ Stream Dashboard (opens in a new tab) before streaming again.
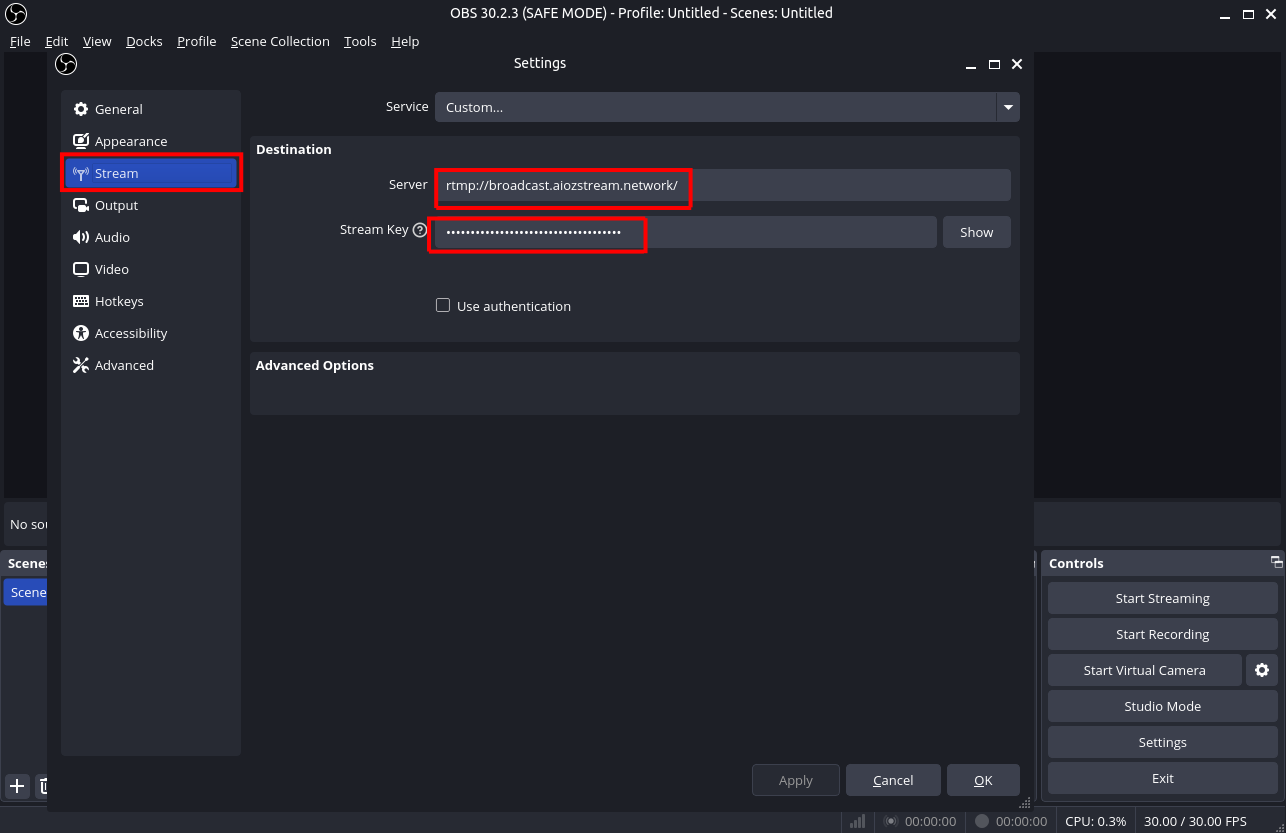
OBS Settings > Stream tab showing Custom Service with Server and Stream Key configured.
Optimize Stream Output
For the best viewer experience on the AIOZ Network, we recommend specific output settings.
- Go to the Output tab in Settings.
- Set Output Mode to Advanced.
- Select the Streaming tab.
These settings are a starting profile for 1080p30 streaming on a stable upload connection. Adjust bitrate, encoder settings, and resolution based on your frame rate, hardware encoder availability, and network conditions.
NVENC H.264 (if available)
| Setting | Recommended Value |
|---|---|
| Encoder | NVIDIA NVENC H.264 |
| Rate Control | CBR |
| Bitrate | 4500 Kbps - 6000 Kbps |
| Keyframe Interval | 1 s |
| Profile | High |
| Tune | Zerolatency (optional, for lower latency) |
x264
| Setting | Recommended Value |
|---|---|
| Encoder | x264 |
| Rate Control | CBR |
| Bitrate | 4500 Kbps - 6000 Kbps |
| Keyframe Interval | 1 s |
| Profile | High |
| Tune | Zerolatency (optional, for lower latency) |
Audio settings (recommended):
| Setting | Recommended Value |
|---|---|
| Audio Codec | AAC |
| Audio Bitrate | 128 Kbps to 160 Kbps |
| Sample Rate | 48 kHz |
| Channels | Stereo |
In OBS, review audio settings in Settings > Output and Settings > Audio before starting your stream.
NOTE: OBS interface labels and available fields may vary by OBS version, operating system, and selected encoder. The screenshot is illustrative; follow the recommended values in the tables where applicable.
NOTE: If you need to lower stream quality, go to Settings > Video and set Output (Scaled) Resolution to 1280 × 720. Then go back to Settings > Output > Streaming and reduce Bitrate as needed.
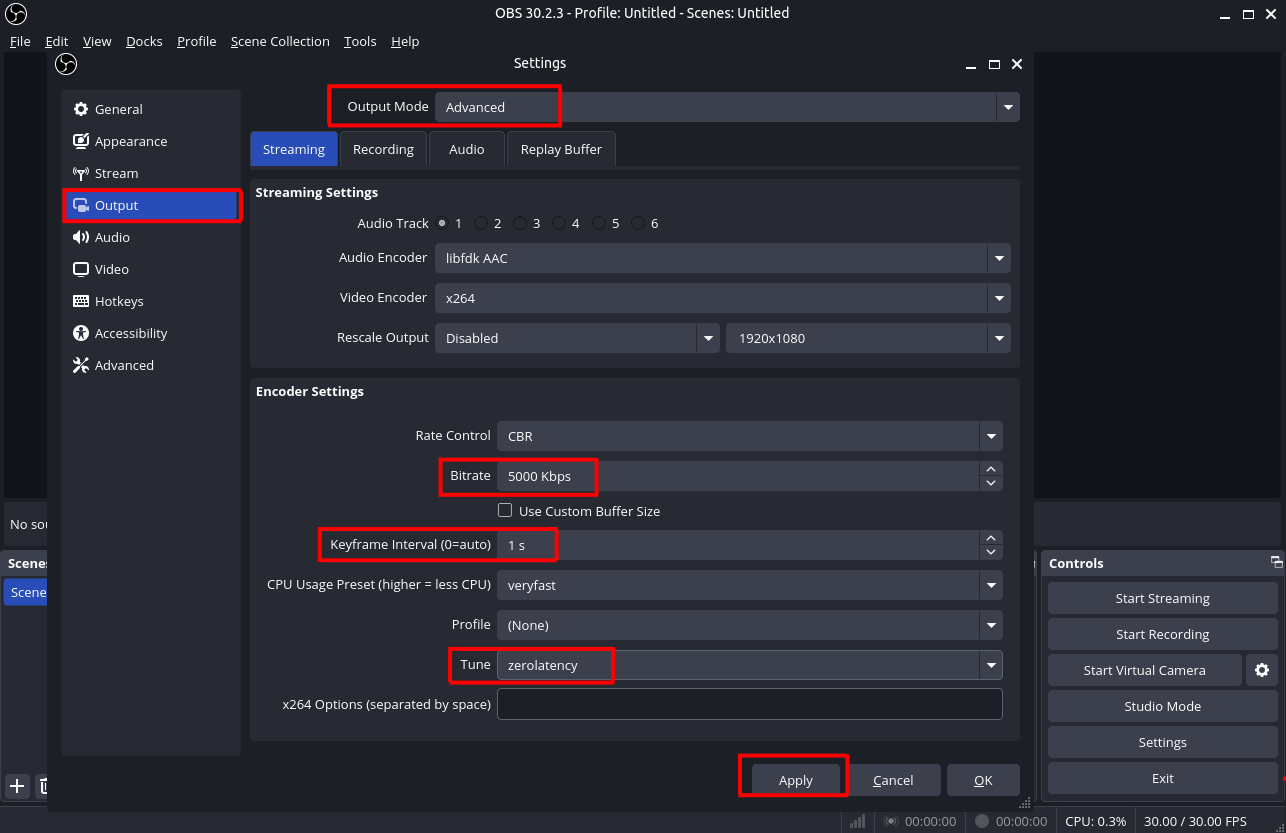
OBS Settings > Output > Streaming tab illustrating advanced output mode settings.
Start Streaming
Once your configuration is complete:
- Close the Settings window by clicking Apply and then OK.
- Verify your scene looks correct in the preview.
- Click Start Streaming in the controls panel.
- Open your AIOZ Stream Dashboard (opens in a new tab) and confirm that the stream status is active.
- Check stream health and preview before sharing the stream.
NOTE: If a livestream entry did not exist before, it may appear automatically after streaming starts with valid credentials.
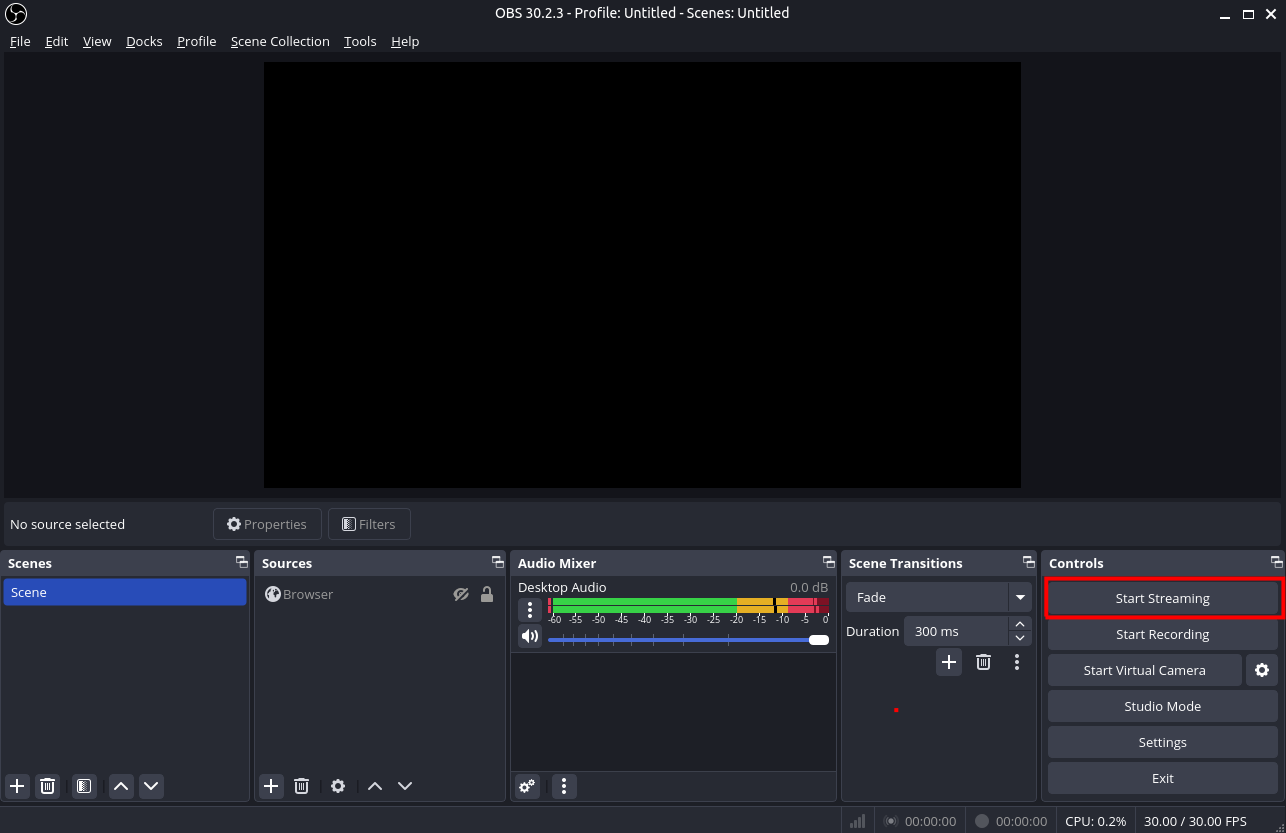
Click Start Streaming in the OBS controls panel.
Next Steps
Now that you are live, you can monitor your stream health and share it with your audience.
- Check preview playback, copy stream link, and share with your audience → View and Share Your Stream
- Manage future broadcasts → Manage Livestream